Wall Painting DIY
Important: Before painting your surface make sure to properly prepare your surface using the ideal preparation and make sure to choose the correct paint for your project.
Tools:
- 270mm paint roller with extension pole
- 270mm paint tray and disposable liners
- 50mm angled brush for edges
- Hand sander with 120-grit sandpaper
- Ladder
- Scraper
- Paint stirrer
- Spare rags
- Spare paint pot
- Drop sheets
Material:
- Painter’s tape
- Sugar soap
- Filler
- Undercoat
- Steps
- Wall paint
- Select your ideal paint –
There are various types of interior paint to choose from and it can sometimes be difficult to identify the correct coating type. Generally, however it is best to use water-based paints for ceilings and walls and water-based enamels and oil-based paints for trims, floor’s architraves, and doors.
It is best to use paint specifically for your need for example with a ceiling paint the formulation is thicker to avoid dripping and tends to be flat helping to avoid light reflectance which also helps to hide imperfection’s.
Generally, a litre of paint will cover around 15 metres squared however when coating over a textured or porous surface make sure to have at least 20 percent more of your coating product available as more paint will be needed on those surfaces. If you’re having trouble calculating how much product you will need make sure to follow the guidelines given by your coating manufacturer and use an online paint calculator to work out how much you will need.
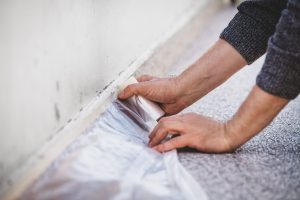
- Protect the floor and area’s you don’t intend to paint –
Be sure to tape any fixtures and hardware to prevent drips from meeting outlets and other areas you don’t want painted such as architraves, skirting and various other trims. Make sure to protect your floors by taping drop sheet’s to edges with painter’s tape.
- Prepare your surface –
Use a light sugar soap mix or sugar soap wipes to wipe down your surface. After cleaning use a premixed filler to go over cracks and fill and holes and allow to dry. After the drying process use a hand sander with 120-grit sandpaper and smooth over the filler and any uneven surfaces. After sanding brush down the surfaces with a soft bristled brush.

- Apply undercoat –
If your surface has any blemishes or is completely new (no paint has ever been applied) than you will need to use a 3 in 1 primer, sealer, and an undercoat to achieve optimal results.
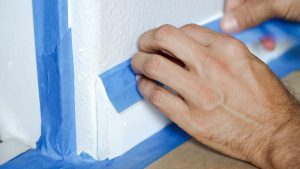
- Paint edges (cut in) –
Make sure to stir whatever paint you are using before use to ensure it is mixed thoroughly. Using an angled brush paint around window frames, cornices, and the edges of the wall, this is commonly referred to as “cutting in”. The painting method is the same weather you’re applying topcoat or undercoat just brush evenly following the tape and going outwards towards the centre of the wall.
- Apply topcoat –
Using a roller with an extension poll allows you to cover a large area in fewer strokes when compared to using a brush, brushes also leave lines from the previous brush strokes. Making sure to keep the tray close to where you’re working, submerge the roller into the paint and roll out any excess paint with the platform on your paint tray. Start rolling the wall around 30cm away from the edge, roll down stopping just short of the painted edges and then roll up ending just short of the painted edges of the ceiling.
Re-coat the roller and apply on to the next meter wide area following the same pattern, once properly dried apply your second coat.
Handy tip: After your first coat cover your paint tray and keep your roller sealed in plastic to prevent paint from drying before the next application.
- Peel off painter’s tape after application –
It is best to take off painter’s tape as soon as possible to prevent the fresh dried paint from chipping as you remove the tape. Lift the end of the tape and peel at a 45° angle to prevent paint form smudging.
Once tape has been removed you will be left with a seamless wall you can be proud of.
Related Products
-
 Select options This product has multiple variants. The options may be chosen on the product pageArchitectural Coatings
FENTOPA AM-335 | FENCE PAINT
$89.00 + GSTMatt Exterior Sun Proof
Environmental Friendly
15L Bucket Covers Up To 80 sqmSelect options This product has multiple variants. The options may be chosen on the product page -
 Select options This product has multiple variants. The options may be chosen on the product pageArchitectural Coatings
INTOPA LS-993 | INTERIOR PAINT
Price range: $49.00 through $109.00 + GSTWall Paint
Washable & Fresh Look
15L Covers Up To 80 sqmSelect options This product has multiple variants. The options may be chosen on the product page -
 Select options This product has multiple variants. The options may be chosen on the product pageArchitectural Coatings
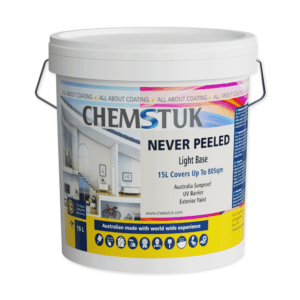
NEVER PEELED LS-335 | EXTERIOR PAINT
$119.00 + GSTUV Resistant, Exterior Paint
Low Sheen Water Base
Environmental Friendly Low VOC
15L Covers Up To 80 SqmSelect options This product has multiple variants. The options may be chosen on the product page -
 Select options This product has multiple variants. The options may be chosen on the product pageArchitectural Coatings
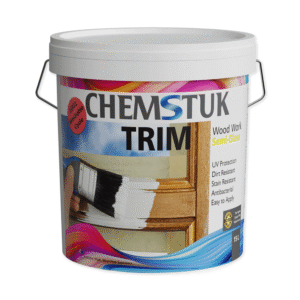
TRIM AG-335 | WOOD WORK PAINT
Price range: $79.00 through $219.00 + GSTWater-Based
Semi Gloss
Interior / Exterior
15L Covers Up To 80 sqm
Select options This product has multiple variants. The options may be chosen on the product page -
 Select options This product has multiple variants. The options may be chosen on the product pageArchitectural Coatings
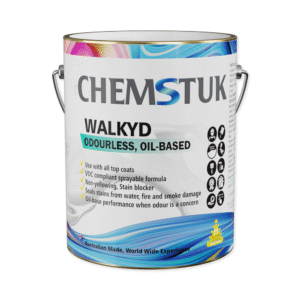
WALKYD LW-835 | OIL BASE PAINT
Price range: $89.00 through $139.00 + GSTOdorless Oil based Gloss
Interior / Exterior
4L Covers Up To 80 sqmSelect options This product has multiple variants. The options may be chosen on the product page